So the pleating of the gold handmaiden is taking a lot of time, but it's worth it. When I started thinking about this dress I thought I was going to do proper box pleats and simply press them down. When I started to fiddle with the fabric I realized that I couldn't make them tiny enough though, so I had to come up with a different process.
First I marked up the whole fabric with straight lines, around 0,7 cm between them.
Then I used a running stitch and sewed two lines together. That forms a ridge.
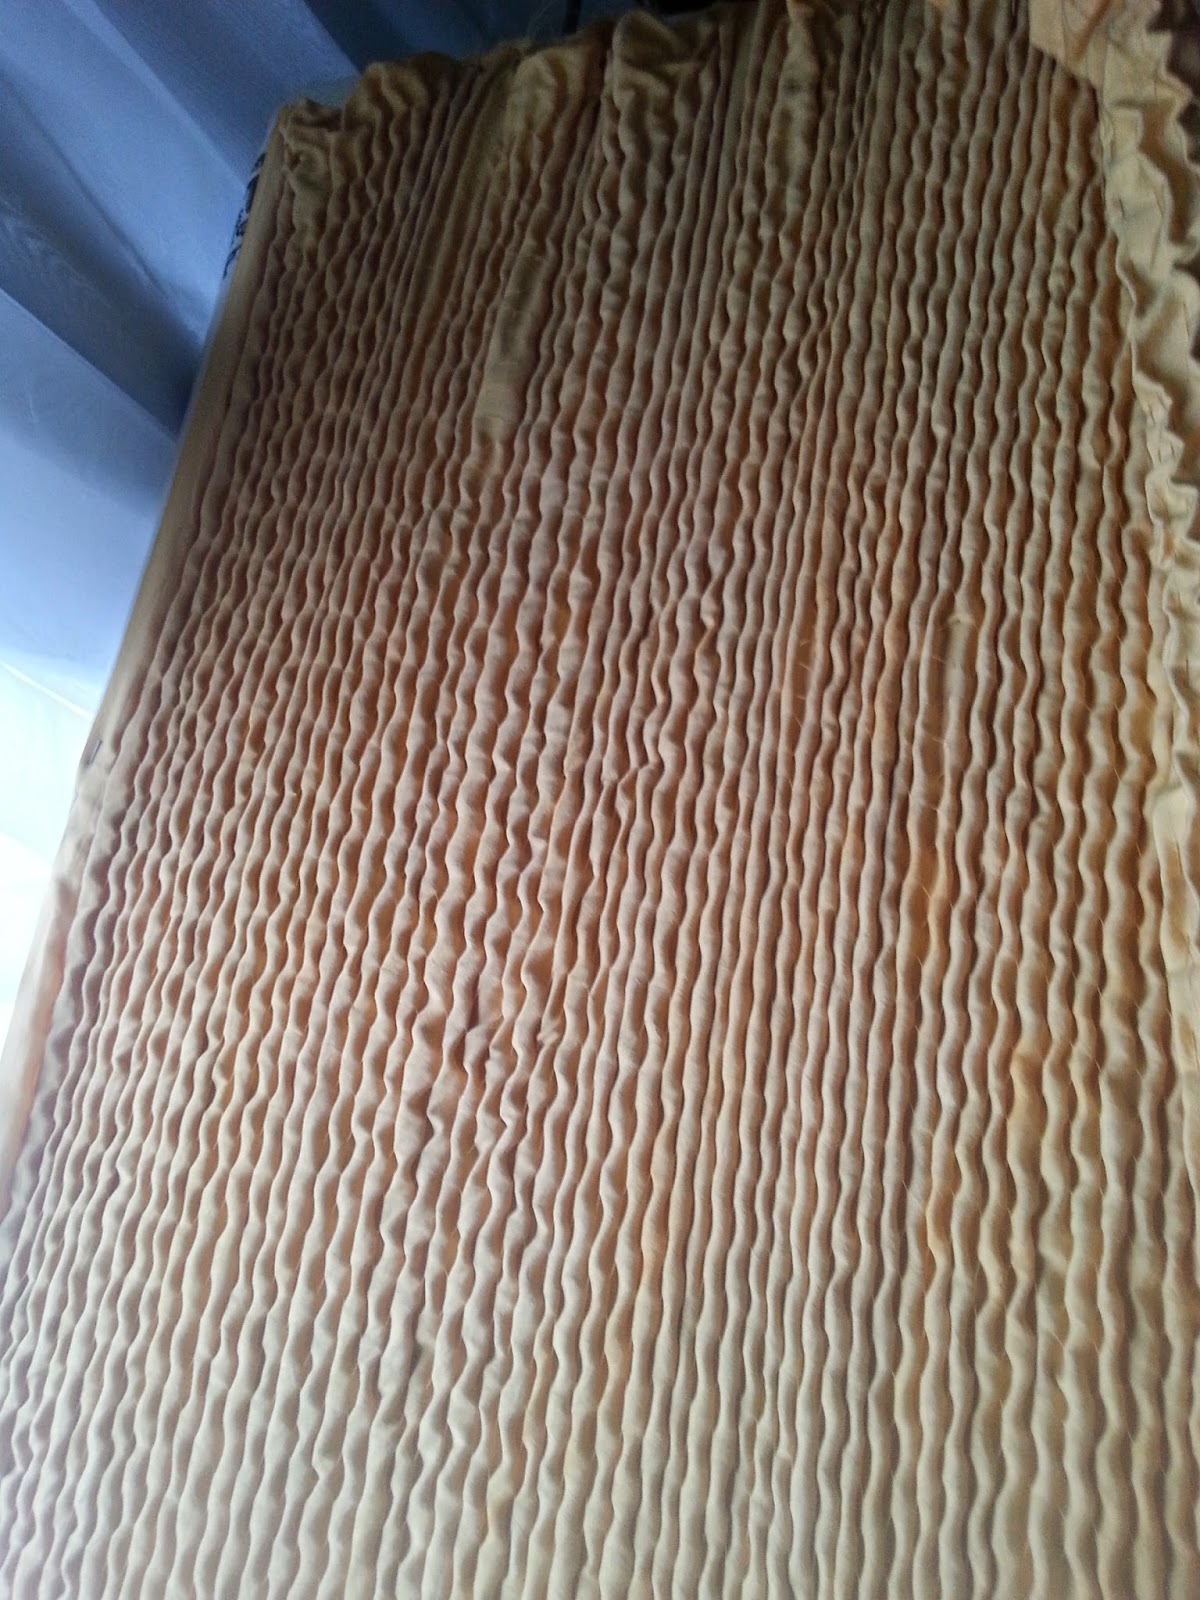
This is what the whole piece looks like when I've finished making all the ridges.
Then I pinned the fabric to my ironing board, trying to stretch the fabric as much as possible. The more you stretch the straighter the pleats will be. Ideally I would have someone helping me to hold on to the fabric instead of pinning it, but being on my own the pinning had to do.
Then spray the whole fabric with starch. I'm
using a strong start made from 1 table spoon potato starch and 150 ml of
water. Use a spray bottle and make sure that all the fabric on the iron
board is wet. Let the starch sink in for around 30 seconds-1 minute. Set
the iron to a fairly high setting, I'm using the silk setting, and
press the iron straight down to the fabric. Don't try to move the iron,
but simply lift it straight up and put it straight down for the next
section of the fabric. It really helps if you also try to use your hand
to stretch the fabric. Go with the iron all over the fabric until it's
dry, or at least almost dry.
Make sure that the fabric is left to dry completely flat, don't hang it.


No comments:
Post a Comment